| 1 |
Open Dreamweaver (double click) |
|
| 2 |
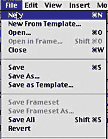
Create a new page: File >New |
|
| 3 |
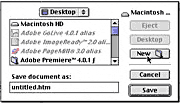
Save the page by selecting File >
Save As then create a new folder on your Desktop
by clicking the Desktop button and then the New
Folder button. |
|
| 4 |
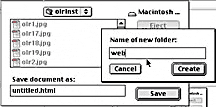
Name the new folder "web" and click
Create |
|
| 5 |
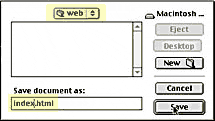
Name the page you are saving "index.htm"
and click Save |
|
| 6 |
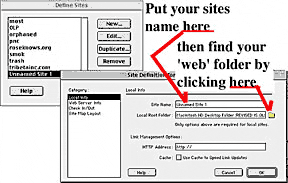
Define your site:
Choose Site > Define Sites then choose
New and name your site in the new box that appears.
Now browse for your 'web' folder by clicking on the little
folder icon.
|
|
| 8 |
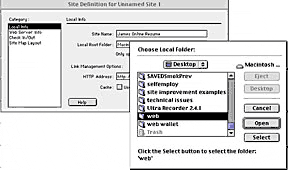
Go to your Desktop to find the 'web' folder. Just "Select"
it by clicking the Select button after you touch
that folder with your cursor. (Do not "Open"
it.)
|
|
| 9 |
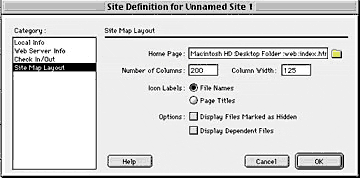
Then select Site Map Layout from the
left side of that new box and use the folder to find the
'index.htm' page you just saved into the 'web' folder. |
|
| 10 |
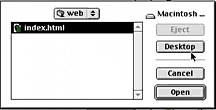
There it is. Hit the Open button then hit the
Create button when it asks you then the Done
button when that box appears.
|
|
| 11 |
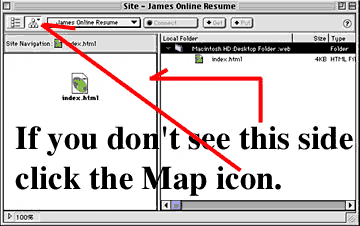
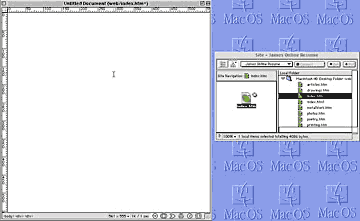
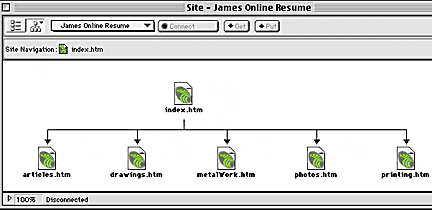
Now you have defined your site. This allows Dreamweaver
to keep an idea of your whole site in its memory so you
can make site-wide changes easily.
You will see your Site Map and Site Files list appear
on your screen. (See image on right.)
|
|
| 12 |
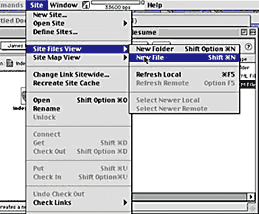
Now you may create all the web pages in your Web site
using the following method:
Click once on the last file in your Site Files list.
Then Create a new file by choosing Site > Site
Files View > New File.
|
|
| 13 |
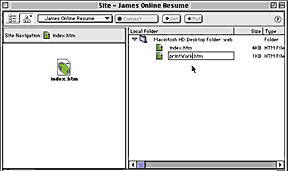
The new page will appear in your Site Files List. It
will be called "untitled.htm" but you may rename
it now by typing into the page's name field. After you
are done with the name add a ".htm" and hit
Return. Now you can select Site > Site
Files View > New File to create another
page in your site.
Create and name each page in your site using this method.
Your names should only contain alphanumeric characters.
(In other words: Never put anything but a letter or number
in your page (or "file") name. Do not include
"-" or "/" or "#" or "&"
or empty spaces either or anything that is not alphanumeric
For example: "paintings&drawings.htm" is
not a correct page (or "file") name. You should
name this page: "paintingsDrawings.htm")
|
|
| 14 |
When you are finished creating and naming all the pages
in your site you are ready to link them to your "index.htm"
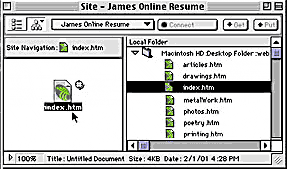
file or "home page." To begin, pull the lower
right corner of your Site Window and make the whole window
as small as you can while still keeping all your site's
files in view. Then move the Site Window to the right
side of your screen. Now double click on the "index.htm"
file in the Site Map side of your site window.
|
|
| 15 |
Your index (or "home") page will
open up and you can now create the links to the rest of
your Web site: First make your home page small enough so
that you can see it and your Site Window next to each other
in the same screen. |
|
| 16 |
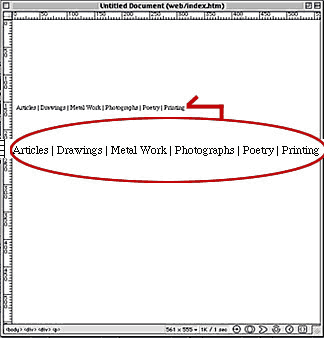
Then write the names of each part of your
site separated by a " | " (That is: a space then
hold the shift and hit the pipe key on the right side of
your keyboard then hit another space.) |
|
| 17 |
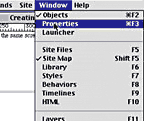
Now select Window > Properties
from the menu at the top of your screen. If there is a check
next to "Properties" then that means your Properties
Tool Palette is already open on your screen somewhere. If
there is no check mark then choose Properties and your tool
palette will appear. |
|
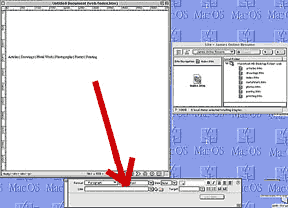
| 18 |
It looks like this =>
|
|
| 19 |
Now set up your work area on your screen so you have
the Properties Palette beneath your home page and Site
Window.
|
|
| 20 |
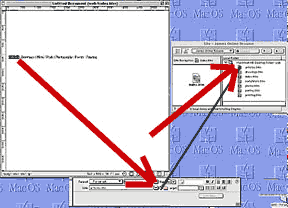
Highlight, with your cursor, the word that represents
one of the parts of your Web site. While the word is selected
move your cursor to the Properties Palette and pull the
wire from the spool icon (found to the right of the "Link"
field) to the page in your File List that that word should
link to. (Click and drag the wire from the spool)
You have just created a link from your home
page (index.htm) to another page in your Web site. Now
proceed in this same fashion and create links to all the
other pages in your Web site. When you are done you will
have created a "navigation footer" or menu.
Center the footer by highlighting the footer and at the
top of your screen select Text > Alignment >
Center.
|
|
| 21 |
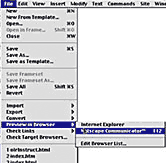
Choose File > Preview In Browser.
This will open up your computer's browser so you can
see what your page will look like when it is posted on
the Web. When the browser opens up you should click on
each link to make sure they all work correctly. (Hit your
k back button to get back to your home page after testing
each link so you can test the next link.)
|
|
| 22 |
You can copy this
footer you have just created to another page in your Web
folder by doing this: Highlight the footer on your home
page, copy it (Edit > Copy), open another page
from the File List (by double clicking on it) and paste
(Edit > Paste) the footer to the page.
When you copy the footer to this page you should add
a link to your "Home" page (which is the "index.htm"
page) by highlighting the word and using the spool as
you did in step 20. Now copy this new version of your
footer to all your pages except for the index page (so
your users can get to your index page from all the other
pages in your site).
At the same time you copy the footer to each page you
can select Modify > Page Properties and type
in a title for each page. (The title will appear at the
top of the browser window when viewed by a visitor. Your
title should written this way: "Your Web Site's Name:
The Page's Topic".) Make sure to create a title for
your home (index) page also.
Note:
As you create links from your home page to all the
other pages in your web folder, you will notice that your
Site Map (on the left side of your Site Window) is showing
each link. You are building a site map as you proceed
with your linking.=>
Tips:
When you pull the spool wire to your File List touch the
page icon to make the link (not the name of the page).
Be careful that you only highlight the word or words
that represent a part of your Web site. You don't want
to make a link out of the " | " that separates
the parts of your Web site in the navigation footer.
|
 |
| 23 |
Now you have created your site prototype (a
working version of your site). |
|
| 24 |
Next you will add content to each page.
Continue
|
|
